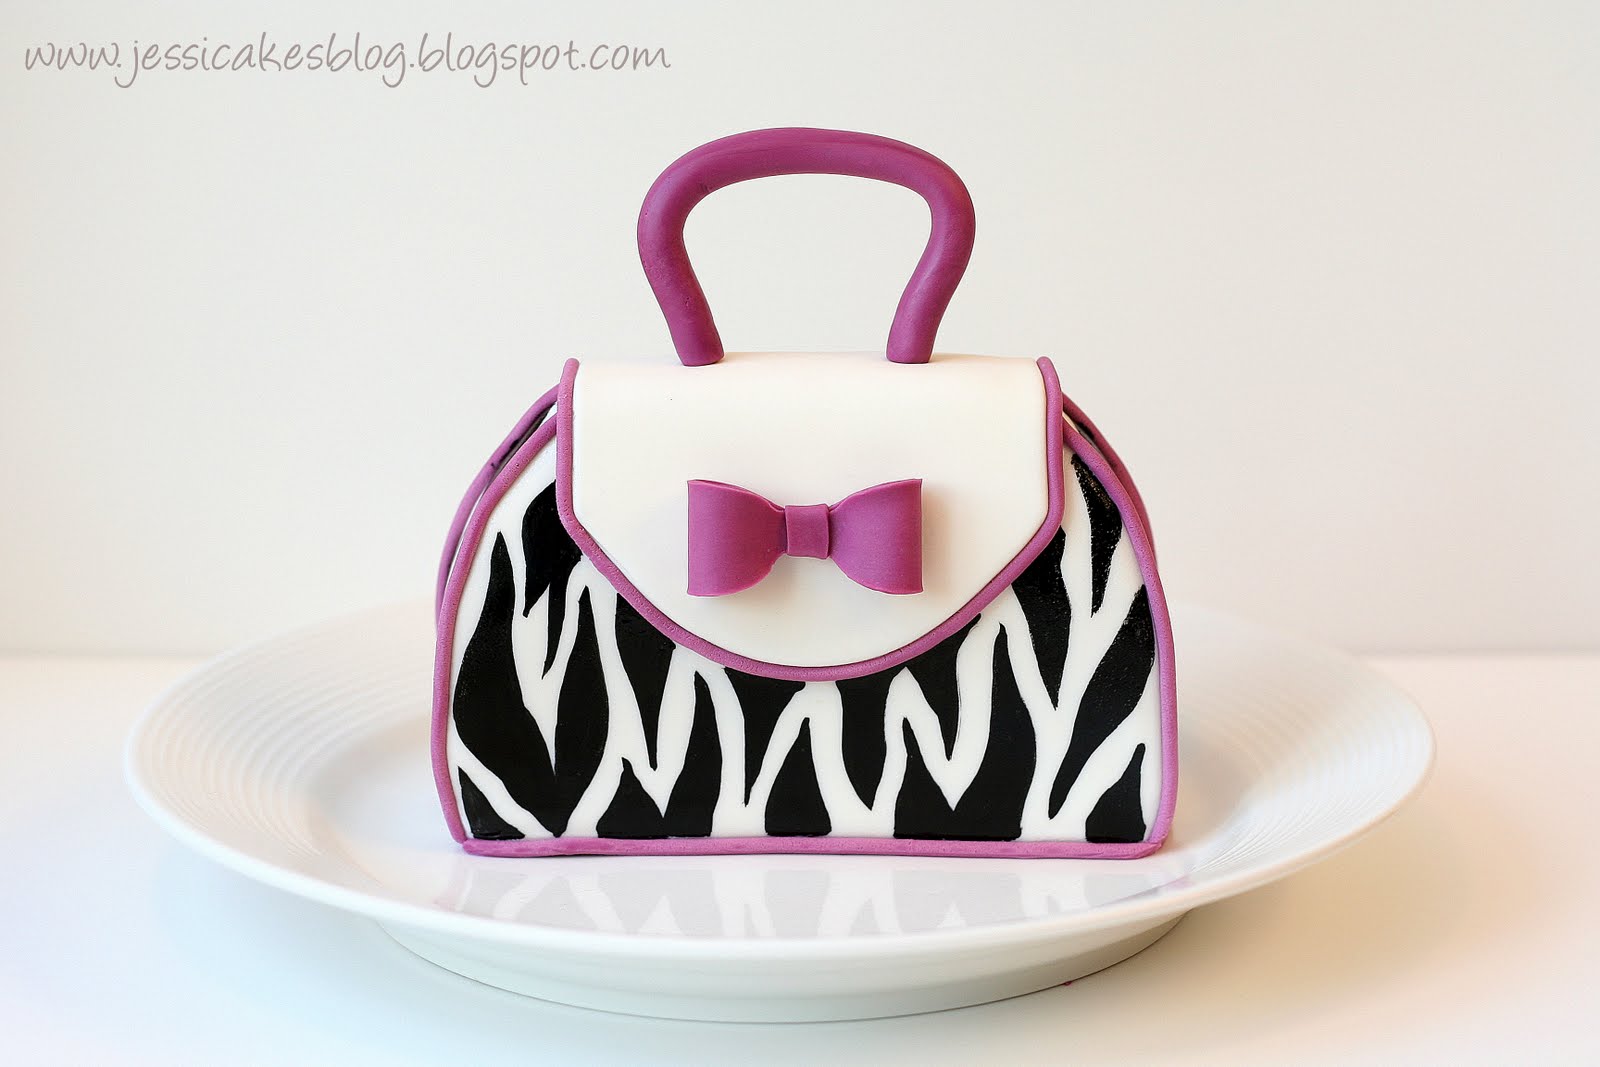
Today I made two identical little purse cake for a few moms at my daughter’s school. These ladies have blessed me so much with unexpected gifts, cake stands and beautiful hand me down clothes. So, what better way to say thanks than to make them a cake! I had a 9″ single round that was perfect for little cakes. I cut it in half to form two small cakes. A little trimming here and there, a crumb coat, some fondant and some hand painted zebra stripes and it was done! – WHEW! All within 30 min of picking my daughter up from school! They loved it.
But what was even more fun was using my new photo booth to take the pics!
Here’s the cake in my new “photo booth” (nicely lit hugh?!):

And here’s how I took it…my “photo booth” over my kitchen sink (don’t mind the mess)! LOL!! Yes, I had to climb up on my counter a bit, but hey, anything for a well lighted photo!!

My girlfriend Mindy (who is a crazy good photographer – click on the link over her name) was over for a playdate and I was telling her how my camera seems to take such dark pics and that I have to boost the lighting all the time (I have the original 8 megapixel Canon Rebel XT…6 years old). She and I were looking around for other places to take pics of my cakes and she suggested over my kitchen sink. I’ve been using white foam core as the base/backdrop lately, so I could easily set it up over the sink and against the upper cabinet…whallah, a new photo booth with amazing lighting! Thanks Mindy…it worked! And, hopefully everyone has a kitchen sink with a window and lighting overhead…so now you too can take some great cake pics!!
Here’s the cake in my new “photo booth” (nicely lit hugh?!):
And here’s how I took it…my “photo booth” over my kitchen sink (don’t mind the mess)! LOL!! Yes, I had to climb up on my counter a bit, but hey, anything for a well lighted photo!!

My girlfriend Mindy (who is a crazy good photographer – click on the link over her name) was over for a playdate and I was telling her how my camera seems to take such dark pics and that I have to boost the lighting all the time (I have the original 8 megapixel Canon Rebel XT…6 years old). She and I were looking around for other places to take pics of my cakes and she suggested over my kitchen sink. I’ve been using white foam core as the base/backdrop lately, so I could easily set it up over the sink and against the upper cabinet…whallah, a new photo booth with amazing lighting! Thanks Mindy…it worked! And, hopefully everyone has a kitchen sink with a window and lighting overhead…so now you too can take some great cake pics!!
Happy picture taking!
Yay! Looks great!
Beautiful, as always.
Brilliant…I will try that!!! I happen to have a kitchen window! Woohoo…fortunately I also have a lovely MINDY!!!! heheehhe Love the cakes by the way!!!
Good idea!!! Thanks for your time!! I loved everything
haha I love it! I do the same thing to get the natural light I use my back porch. I get the perfect lighting there.
VOILA…what a great idea, i will be trying that too.
wonderful post, very informative. I ponder why the other specialists of
this sector don’t understand this. You must proceed your writing. I’m confident, you have a great readers’ base already!
My blog ; cheap luggage sets
Is this really a cake, but it was a bag, I wonder how made this and for sure you take lots of time and effort in making it, and it was really impressive.
Ok, it might be a silly question, but i really don’t know where can u get that white backdrop?
It’s foam core…from Michael’s (a craft store) or even the Dollar Tree.
Blessed Be The Name Of The Lord and for his daughter JESSICA HARRIS!!!! Just when I needed a different take on taking good photos of my works I find this post. I’m so very grateful wow JH!!!
How Sweet It Is to get your comment!! LOVE that! May the Lord bless the work of your hands!!
Can I please ask, is the foam board one piece or two pieces placed together? Sorry, no Michael’s or Dollar shops from where I come from !! Thanks!
They are 24×36 foam boards I just place butted up to each other. You could tape them so they don’t shift around on you! You can also use cardboard and tape different kinds of paper to it for more variety if you can’t get foam board. Blessings!
Thanks Jessica for that wonderful tip.. I wanted to started taking some nice pictures of my cakes..