 My sweet sweet friend turned 40 today! What’s crazy is that I’m getting closer to 40 and realizing that it’s such a young number!!!!!!! We’ve only lived half our lives…and most of it was spent messing up!!!! – and learning what NOT to do! Now it feels like we’re figuring things out and enjoying life more than ever!! And Jen would know…she is the most active, amazing, high-energy gal I have the privilege to know! I am constantly amazed by her stamina! WHEW! – I feel like I’m 50 when I’m around her!
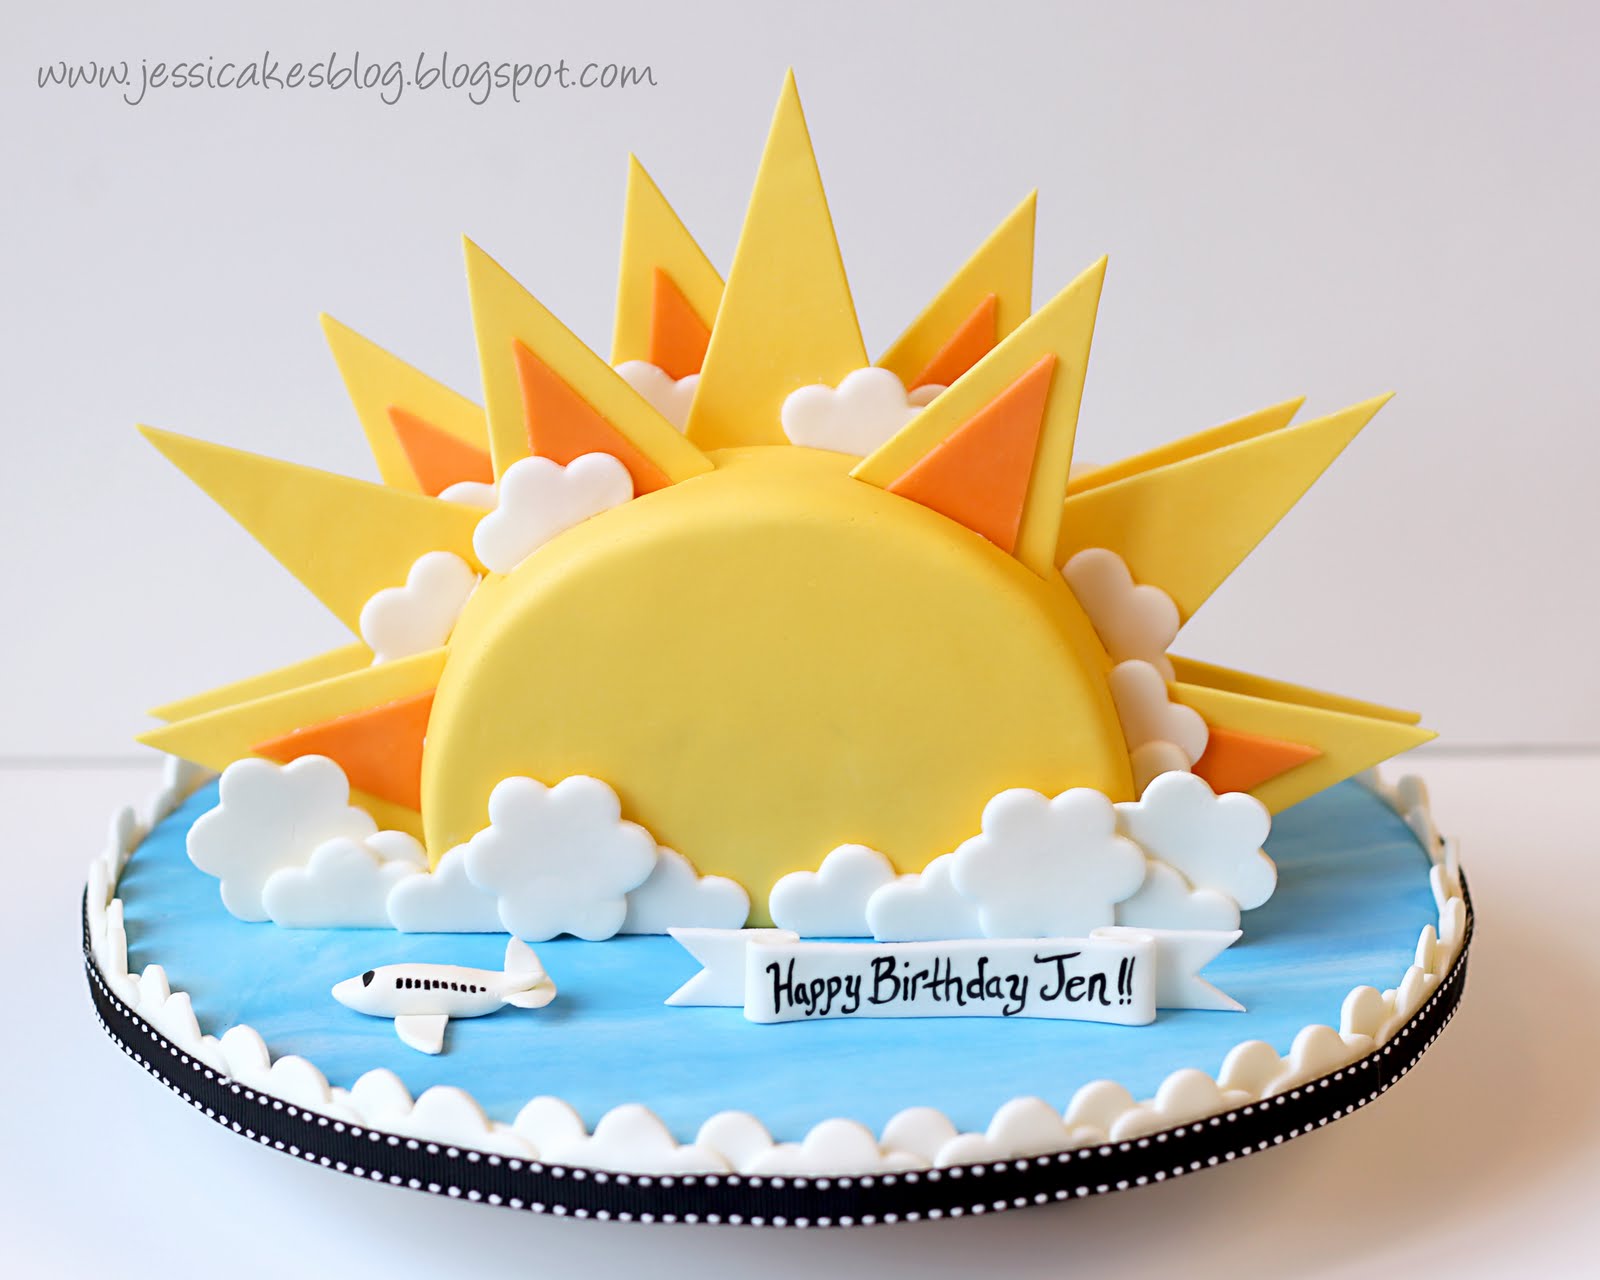
Two years ago I made Jen my first flower pot cake. So, I decide she was due for a Jessicakes…but what was I going to do!??? When I think of Jen, I think of radiance, beauty, warmth, energy and fire! Yes, fire…she is a little spit-fire! So, what more beautifully displays that than the sun. She has a light, an energy, a warmth and a beauty to her that ALL who meet her acknowledge…she exudes love and sincerity. That is why I made her a sun cake! And, the little airplane!? – well, we’ve joked in the past about flying off to Mexico and leaving everything behind because mama needs a break! She also has three little ones and squeezed them together closer in age than mine…so, we’ve had lots of great conversations lately about training up our sweet kids in the ways they should go…and trying to not loose our minds in the process!
Jen, I love ya and thank you for all your encouragement, your energy, your warmth, sincerity, radiance and most importantly your love for Jesus and your family! May the Lord richly bless you this year with joy, love and perhaps that trip to Mexico! LOL!
Now, onto the creation of this little cake! There was one thing I would do differently next time…the sun rays! I added a bit of gumtex to my fondant (so that the rays would set up hard) and rolled them really thin so they wouldn’t be very bulky and heavy looking. However, they were really hard to attach to the cake…on a radius. I ended up carving out a little slit in the cake for them to fit into, but they still didn’t stay upright very well. So, I ended up using a bit of melted chocolate (white chocolate) which wasn’t the same color as the yellow (and I didn’t have any yellow chocolate coloring around) so you can see it in some areas. It wasn’t as clean as I would have liked!!! Next time I do this (if there’s a next time) – or if you all try it – I would make the rays a bit thicker, cut the bottoms to match the radius of the cake, and use melted chocolate colored the same as the rays/cake. The thicker bottom would make it easier to attach to the cake. You could even stick a little toothpick in them too?! Anyhow, just think how you’re going to mount them. Carving a slice in the cake to insert them wasn’t the easiest or cleanest way…in my opinion!
Oh, and one more thing…the blue board was white and blue fondant swirled and rolled out together. I was super happy with how that looked…like the sky…or even water if I would have covered it in piping gel. Fun times!
¡que maravilla! Felicidades por el trabajo bien hecho.
Un abrazo
Pero qué monada por favor, haces unas cosas espectaculares, cualquiera se atreve!!!
Besitos linda.
Jess, this cake is stunning!!! The pictures don’t show the imperfections, it just looks beautiful. Royal icing is a great glue but is a pain to make if using only as glue. Edible glue also works well, is colorless and easy to make, but needs to be made in advance. I’m sure you’ve heard about it, but here is a link nevertheless for anyone who doesn’t know about it.
http://www.youtube.com/watch?v=g_1vtYY-wFQ
Anat
It’s lovely what a happy gorgeous cake!
I love this cake and I am glad to have found this blog. You are absolutely amazing I would like to know how this was done. Any tutorials?
It’s pretty simple…you take a 6″ layer of cake and slice it in half so you have two half circles. Put a slab of buttercream on one and stack the other on top. Chill it well, then turn it so it’s on the flat side and crumb coat it and cover it in fondant. Then, add your sun rays (which you’ll want to make a few days ahead) and put them on with a little melted chocolate. When you make the rays, you can slip a little wire in them or a thin toothpick so that when you slide them into the cake they’ll stand up. That’s it!
How did you make those perfect rays – Shiv