Staging
  • Home
  • About Me
    • My Story
    • Contact Me
  • Cake Blog
  • Cake Resources
    • Craftsy Discount Links
    • Tutorials
    • Recipes
    • Cake Questions & Answers
  • Favorite Cake Tools
  • Personal Blog
  • Design Shop
  • 0 items
  • Home
  • Jessica Harris Cakes
  • Cakes
  • Ruffle Flower Purse

Ruffle Flower Purse

February 11, 2012 / Jessica / Cakes, Jessica Harris Cakes / 12 Comments

 Happy Birthday Alyssa!!
 
One of my sweetest friends had a birthday last week!!  If I’m able to make a friend a cake…I JUMP at the chance!!  Life is so busy, unfortunately, so I can’t get to all my friends every birthday…but if I could make all my sweet friends a cake, I would!  The funny thing though was that this was the second cake I attempted to make for her! :)  The first one was going to be a 6″ tall cake with a 4″ cake stacked on top.  It was going to have a gray and turquoise chevron pattern around it with a funky flower on the top tier.  But, it ended up being a disaster so she didn’t get a cake until 4 days later! – and it wasn’t the original!  I was so bummed she couldn’t have a cake for her actual b-day, but for some reason, it just was not supposed to happen.  I had family come into town that weekend, my husband and I had a sweet date planned that I couldn’t pass up, and then had some serious modeling chocolate mishaps…it just wasn’t meant to be…as much as I tried and labored…it didn’t happen! 

 It made me think of Proverbs 16:9: “In his heart a man plans his course, but the LORD determines his steps.”  I had her first cake all planned out and it was going to be great!! :)  But, it wasn’t what the Lord wanted me to do that weekend!  I guess that’s why I’m glad I don’t have a business and the cakes I make are usually unexpected! – I can make it work into my schedule..and if it doesn’t work out, I can do it another time or not at all! :)  So, a few days ago, I got out the flour, sugar, fondant and buttercream and got to work on another one!  And I’m glad I did…I really thought this turned out cute!  – and so did Alyssa!  And, that’s all that matters!

 This was my first zipper!! :)  I was so excited to try it!  I used a real zipper to create a mold in some modeling chocolate.  I rolled out a thick piece of modeling chocolate.  I sprayed the new, clean zipper with some Pam spray, then laid it into the modeling chocolate nice and evenly.  I pulled it out to leave the impression behind.  I let the chocolate set up overnight so it was nice and hard.  I rolled a rope of fondant mixed with Tylose and laid it over the mold which I had dusted with some cornstarch.  I turned it over and gently pulled out the fondant and voila’!  – a zipper!!  I let it harden for a day or so then painted it with the silver luster dust.  I hand cut out the zipper pull and let it sit to dry, then also colored it with luster dust.  It looked great to me! – for my first attempt! :)  I was happy!!
 
Here is a picture of the front and the back together so you can see it was all random!
I carved the cake down from 3 stacked layers of 6″ round cake filled with buttercream.  I crumb coated it in buttercream then laid the fondant on it.  Because the base tapers in quite a bit (which is sort of hard to see in the pics) I had extra fondant.  So, I gathered the extra fondant and created a seam in the front and in the back and used my scissors to cut that excess off (which I knew I’d be covering anyway in flower petals).  I added the top ruffle edge and black extruded rope at the base of that ruffle.  I then began adding the rolled out “petals” from outside to inside.  The flower in the center (which consisted of 5 circle layers frilled and stacked on each other) was the last finishing touch.  After all the “petals” were in place I took my black gel color, mixed it with a little vodka and began painting the edges of all the ruffles.  It was NOT as clean as I would have liked…it was really hard to do an even layer of paint all the way around!!!  But, my husband actually liked how it wasn’t even and “funky” he said! :)  I guess if I would have wanted it to be really even, I could have extruded some really thin ropes of black fondant and put them on the edges of the petals.  That would have taken much longer, but would have made it look like piping.
I guess the lesson on this one was that even though you might have plans of your own, the Lord might have other plans…and they are always better!

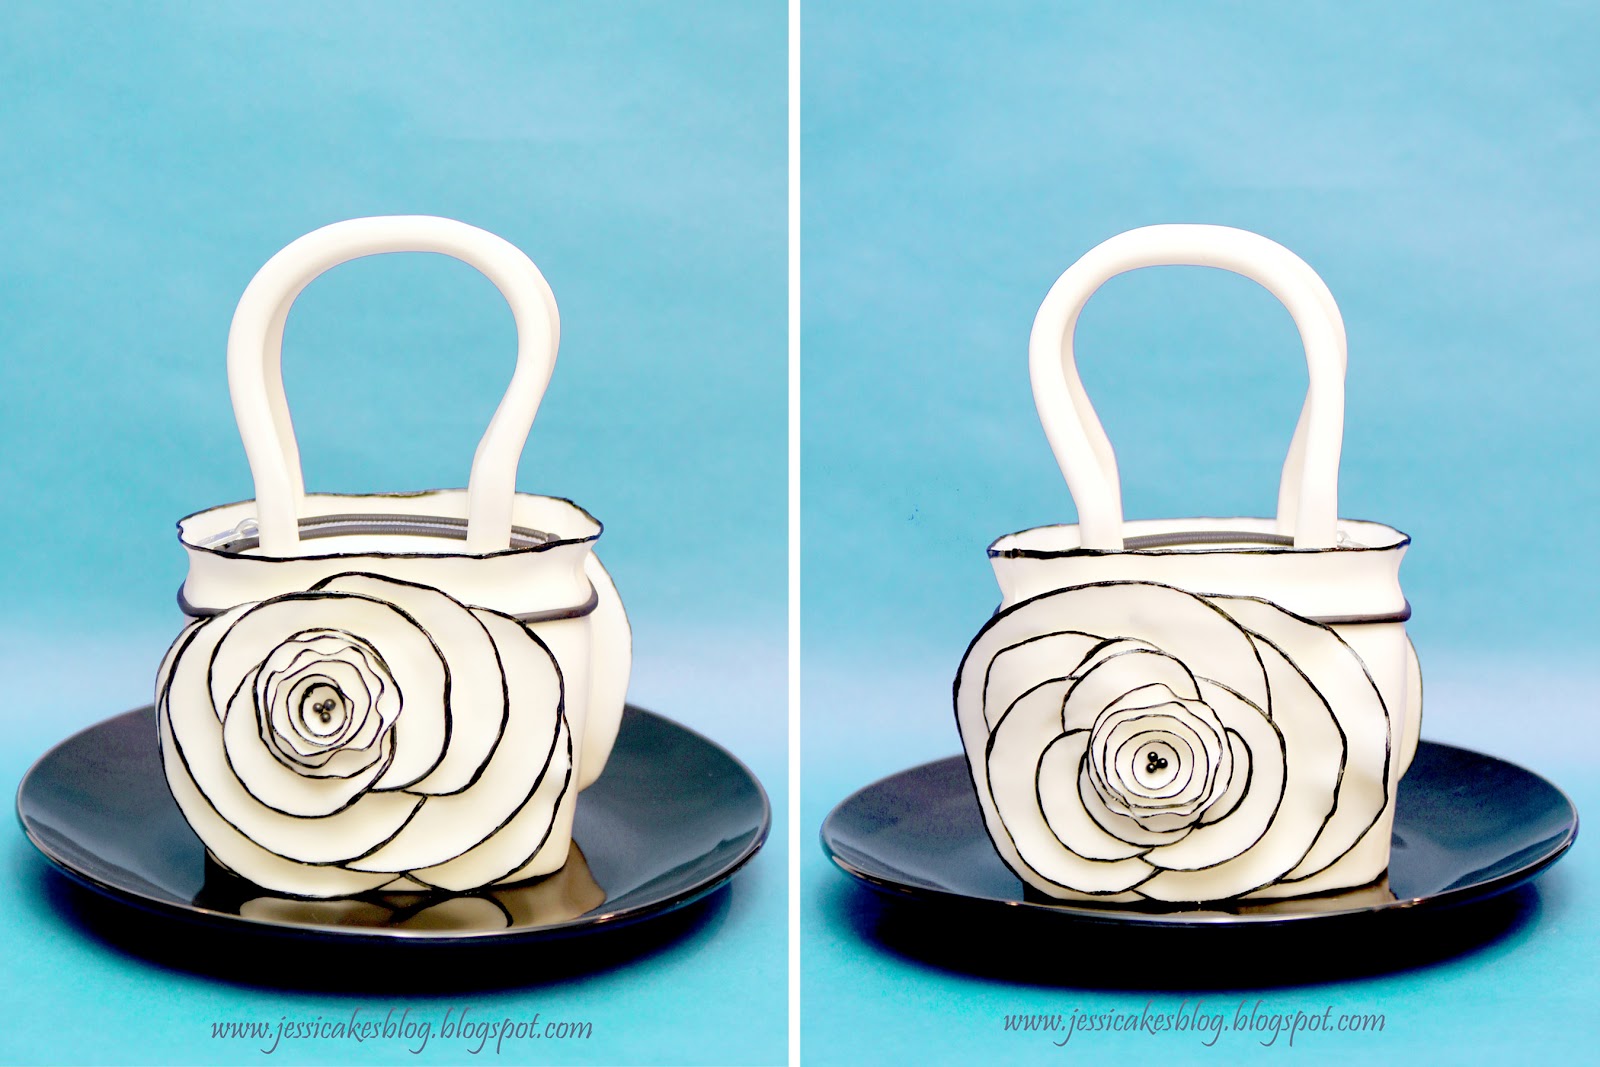
One more quick random thing!  Photo editing!!  I live in Oregon and it can be pretty dark and rainy here.  I took these pics in the morning, but there wasn’t much natural light and I didn’t love the color of the back ground I had available.  SO, enter photo editing software!!!  I use a simple Photoshop Elements to help enhance my photos.  Here’s the before and after…the original photo and after edits.

I wanted a softer back ground and a more “clear”/brighter picture.  So, I boosted the light levels, darkened up the shadows a bit to give it more contrast.  I then selected everything but the cake itself and created a new “background” layer.  I changed the hue of that layer as well as the saturation and got a softer more Tiffany blue that I thought worked better with the cake.  Voila’! – a much better photo! :)  I hope that helps…you can do that at home too!

Thanks for looking!!!
Birthday Cakes, Sculptured Cakes

12 comments on “Ruffle Flower Purse”

  1. Patricia says:
    February 12, 2012 at 1:36 am

    i just love all the things you do! and i love that you tell us how to do things…

    love the cake too!

    Reply
  2. Fairly Odd Mother says:
    February 12, 2012 at 2:40 am

    Another winner! Congratulations!

    Reply
  3. rose says:
    February 12, 2012 at 12:59 pm

    lovely cake! lucky girl congrats on your first zipper

    Reply
  4. Eftychia says:
    February 12, 2012 at 3:27 pm

    Beautiful work! I would love to have this as my birthday cake…

    Reply
  5. Sarah (Canterbury Cakes) says:
    February 12, 2012 at 7:53 pm

    Such an elegant cake. I love the zipper!! It works so well. Thanks for sharing how you made it.

    Reply
  6. Ana W. says:
    February 12, 2012 at 8:14 pm

    This is so beautiful! Amazing… =)

    Reply
  7. Jodie says:
    February 12, 2012 at 11:32 pm

    This is beautiful!

    Reply
  8. Emelie says:
    February 17, 2012 at 1:24 pm

    what a great idea to fix the images a bit.
    in Sweden, we have so dark in winter so it can really be needed!
    i love your blogspot! thank you for sharing all the tips

    Reply
  9. Alyssa says:
    March 24, 2012 at 1:26 am

    I was the lucky girl! I love you my dear friend! You have such an amazing gift! This cake was the best…to look at and to eat! It was so hard to cut into this work of art, but the inside was so yummy! I just couldn’t believe you made it for me, I felt very special!

    Reply
  10. I Sugar Coat It! says:
    August 27, 2012 at 11:18 pm

    This is stunning! What sizes circle cutters did you use for the flowers? Also, when you set them up, were they placed off-center to give that effect? Thank you so much fo sharing your talent and techniques so freely. Every cake is a work of art. Jacquee

    Reply
    • Jessica says:
      August 28, 2012 at 12:16 am

      Thank you Jacquee!!

      I have no idea! After I made the purse, I just started cutting loose circles out and attaching them. I’m sorry! I was winging it on this one!

      Reply
  11. Anonymous says:
    January 29, 2013 at 5:29 pm

    Purse is beautiful. Thanks for the instructions on making the zipper. Kathy

    Reply

Leave a Reply Cancel reply

Your email address will not be published. Required fields are marked *

Please contact me if you have questions

Up to 33% off Clean & Simple class

titleCard *This is my first ONLINE class and the foundational class for how to get beautiful, clean precise cakes. I also introduce my wax paper transfer method to achieve flawless designs on your cakes.  Click HERE, find the class and add it to your shopping cart.  When you go to to check out you'll see the discount.

Up to 33% off Elegant Techniques

titleCard eThis is a class filled with over 30 different textures & techniques from woods, to scales, to feathers, building materials, western textures and woven techniques you can use on your next cake project!  Click HERE, find the class and add it to your shopping cart.  When you go to to check out you'll see the discount.


Up to 33% off Playful Techniques Class

titleCard

This is a class filled with over 30 different textures & techniques from woods, to scales, to feathers, building materials, western textures and woven techniques you can use on your next cake project!  Click HERE, find the class and add it to your shopping cart.  When you go to to check out you'll see the discount.


Up to 33% off Simply Modern class

titleCard *This is my second ONLINE class and is a more advanced class showcasing how to build tall cakes, use wafer paper and create lots of various metallic finishes including metallic lace. Click HERE, find the class and add it to your shopping cart.  When you go to to check out you'll see the discount.

Up to 33% off Birthday Cakes Class

titleCard *This is my THIRD online class with Craftsy!! I showcase how to use my special rice crispy treat recipe, how to sculpt and get smooth finishes. Click HERE, find the class and add it to your shopping cart.  When you go to to check out you'll see the discount.

Categories

Copyright © 2010-2018 Jessica Harris. All content on this blog, including text, original photos, templates and ideas, are the sole property of the author. If you intend to use any of the text, templates or images within, it must be linked back to this site with credit given to www.jessicaharriscakedesign.com and/or Jessica Harris Cake Design. No methods, designs, images, templates, text or other content from this site can be copied or used for profit in any form without proper approval and a licensing agreement is reached.

My Favorite Places to Shop

Craftsy Cake Decorating Class

zulily_logo

Farm-Fresh-logo3 (1)

pastry portal

Gifts Made by You - Shop Now on Zazzle.com

©2015 Jessica Harris Cake Design - Designed by Virtus Designs, LLC