
I’m loving gray and red!
What a gorgeous combination of colors!! The flower just pops off this cake!!

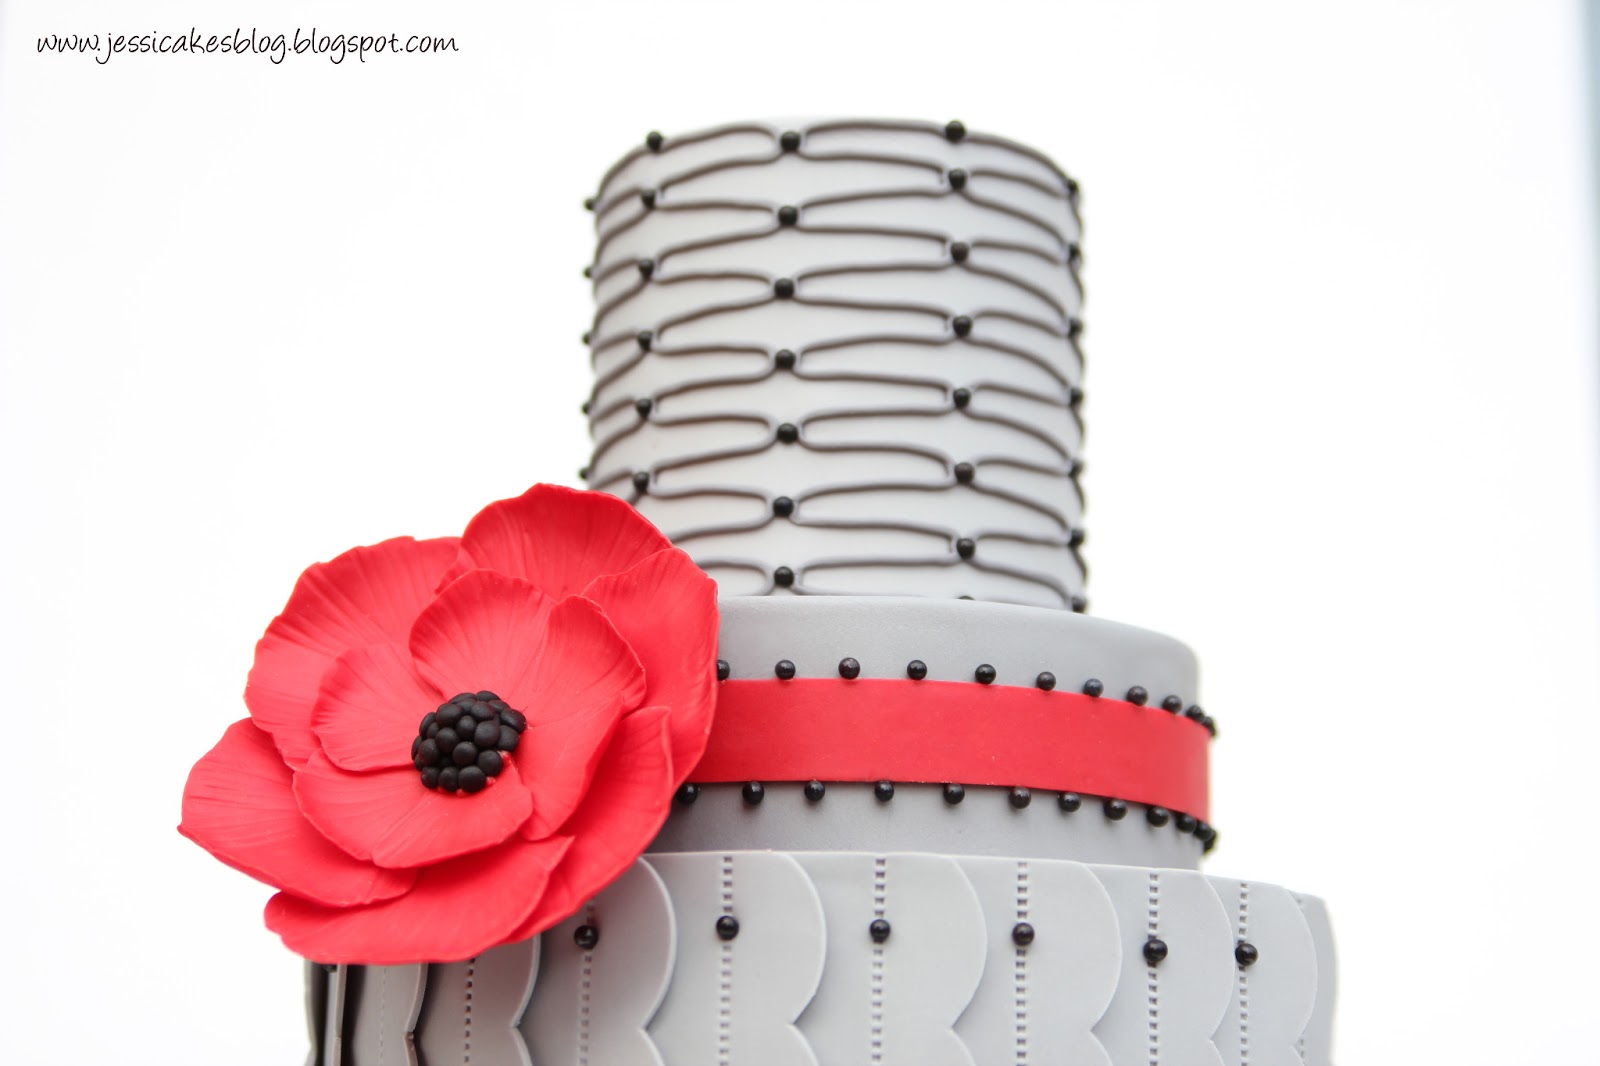
This is the fourth cake I made during my Craftsy Class. This cake showcases my signature flower and how to do an extruded design on a cake! – YES! – extruded fondant! NOT piped with royal icing!!

I can’t pipe a lick! Well…I can…but it would NOT look like that!! It would look like a child did it!! I’m too much of a perfectionist to pipe anything unless I can be guaranteed it’ll look good!! I know what I’m good at…and I try to stay within those limits!! :) Plus, I really do not like making royal icing and will try to stay away from it as much as possible! I don’t know why…I think it’s because I just can’t figure out the right consistency!

So, using my wax paper technique I show you how to get that piped effect during the class, but with fondant!! – and get it to look GOOD!! There are SO many things you can do with extruded designs. The trick is getting them on your cake…but, I show you how!!

And here are those sweet ruffles again! I didn’t want to do too many different designs during the class because the focus was really on the wax paper technique. So, I did the ruffles again (see the pink ones HERE) and made them all a solid color…no alternating colors. It just shows you how versatile this ruffle design is. You can make it work for lots of styles and lots of designs! And, by changing the color, you can get a very soothing/subtle effect. Wouldn’t this be amazing in all white on a wedding cake! Oh my!

I just wanted to thank all my friends out there for taking this Craftsy class and being SOOO encouraging!! My heart is to share and to help, so I’m so thankful you are all gleaning great info from it that is helping you!! I hope it’s been another tool in your cake decorating kit!! And remember it’s 50% off only here on Jessicakes!!
God has been so good to me and I’m so thankful He has allowed me to use this platform to share the talents He’s given me! Praise you Jesus! – for I am fearfully and wonderfully made!! Thank you for blessing me beyond what I deserve!! To you be ALL the glory!!
Best wishes sweet friends!!
stunning…!!just wondering..is this covered in the crafty class the one is going on now..or is this going to be in your next class..?another question..the flower is gum paste?..how did u get it red?..thanks!!
Thank you! I make this cake in my current Craftsy Class called, “Clean and Simple Cake Design”. There are four cakes in the one class. The flower is modeling chocolate made with red Wilton candy melts. Blessings!
This is SUCH a gorgeous cake!! Then again I love all of your cakes, but I think this might be my new favorite…the gray is so perfect. And I also stink at piping and have been using extruded fondant for borders, so I like your idea of using it on the cake sides as well. Genius!
Hi Jessica!
I signed up for your Craftsy class and somehow my question in the extruding section went MIA. I wanted to know how you mixed the grey colors. From what you said in your Craftsy class you used modeling chocolate for your ruffles. Did you mix white and black candy melts to get this grey? How did you manage to get the fondant to match the grey of the modeling chocolate. Getting colors to match is always so tricky for me! Thank you!!
I’m so sorry!!
Actually, the gray ruffles ended up being a combo of black modeling chocolate and white fondant. It wasn’t straight modeling chocolate like the pink ruffle cake. For the fondant I extruded I mixed Wilton black gel color into white fondant to get it gray. If you notice it’s a few shades darker than the top tier, so it wasn’t an exact match…but you don’t even know! Black Wilton candy melts have the same black as their gel…so, you can get the colors pretty close! I do end up adding a little TINY bit of green in it so it doesn’t look purple…it helps to offset the purple in the black colorings.
I hope that helps!!
Oh ok! Yes I tried doing mixing the black chocolate melts and white and got a really weird purple color. So you’re saying it was black modeling chocolate mixed with white fondant and then you added green gel color? Or green modeling chocolate? Thank you again!! I am going to attempt the grey cake and will post pics onto the Craftsy class projects page once I’m done :-))) Super duper excited!
I added just a tiny, TINY bit of green gel color. You could also add a little green fondant/modeling chocolate…just go slowly. I can’t wait to see it!
What a beautiful looking cake. Love it!
Beautiful cake. do you mind sharing what cake pan size was used on each layer and how tall each layer was?
Thanks
I use 2″ pans to bake my layers, and all my cakes bake up a bit differently. The bottom cake was 6″ tall and 8″ round, the middle cake was 6″ round and 2″ tall and the top was a 4″ tall and 4″ round cake. Blessings!