My sweet baby girl turned 9 years old last week!! OH my goodness…NINE!!

Life, time, treasured moments, babies cuddling in my arms, sweet girls drawing me pictures, my adorable son wanting to marry me…all those precious moments are passing so quickly before my eyes it’s incredible!!
Even more now than ever I feel like I need to be “present”…to be still, to look at, to see my kids, and to watch them grow up!

They are such amazing gifts…their hearts are treasure boxes.
With love, sacrifice, patience and a lot of prayer, I get to pour into those little “boxes” messages of love, grace and truth. I get to give them my time, my attention, my praise, the Word of God. Through my love and training, I get to fill their hearts with security, comfort, integrity and joy.
I get to shape and mold their lives forever…what a calling…what a privilege, what an honor! – and one never to be taken lightly.

My prayer is that I…that we…would capture these moments and not let them pass. These precious few years that we have left to hold them, tell them we love them, tell them how amazing they are, how important they are and how the Lord has created each one of them for an incredible purpose and an incredible story…
…and we get to be apart of watching it unfold! – to watch them unwrap it!

Here is my beauty! My precious girl…the first treasure box God gave me. She has a heart of tenderness, a deep soul that desires to know the Lord more, a precious ability to discern the needs of those around her, and a hilarious laugh that makes me want to tell her another funny story!! :) She has a profound talent for writing and for encouraging others…she is going to do great and marvelous things for Jesus!!! I can’t wait to see what’s in store for her.

Raquelle…thank you for making me a better mom. Thank you for your tender heart, your compassion and love for me. Thank you for forgiving me when I fail and for desiring to be the best daughter you can be! I love you more than the moon and the stars!!
OK…All that being said…


I started stacking my layers onto one of the foam core boards (using two half pieces of cake on the second level), weighing out 5oz of buttercream filling for each layer (crush up Butterfinger candy bars and put them in your vanilla buttercream for a taste of heaven). Continue stacking/filling until you like the height. I went for 5″ or so.
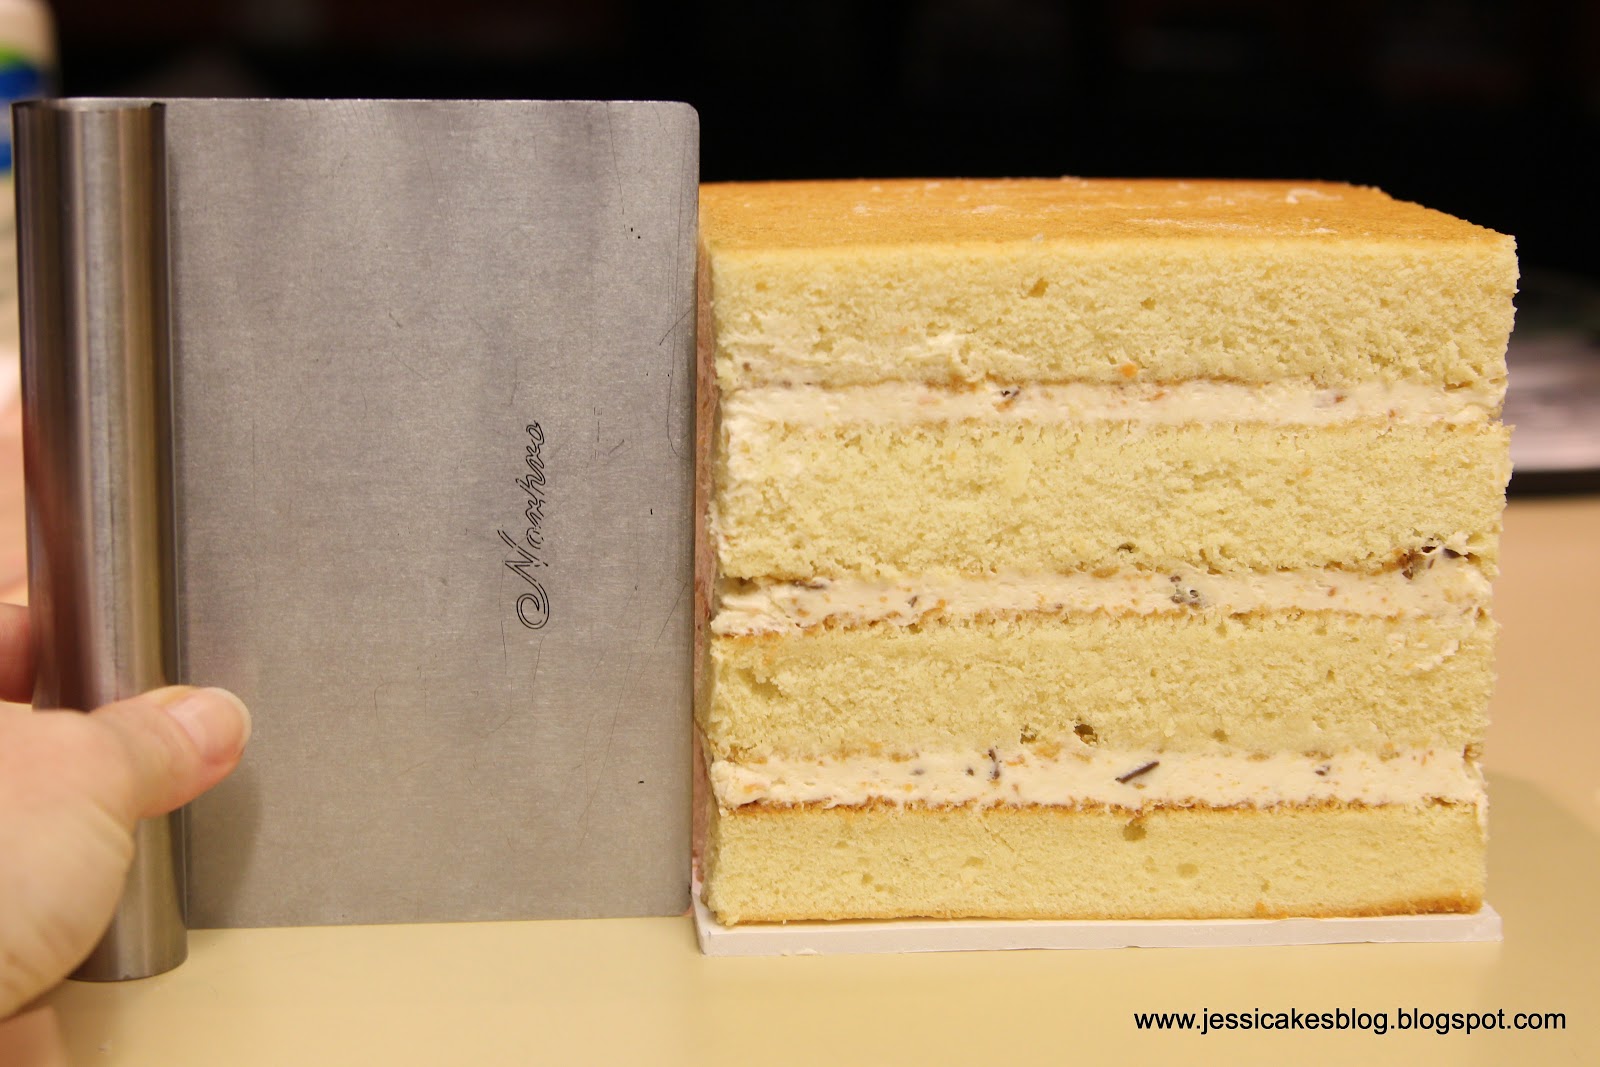
As you stack, make sure you are centering your cut layers and keeping things nicely lined up. See how nice and square everything is without even doing anything yet!!?? That’s the HUGE advantage with using frozen cake and cutting the squares out when it’s frozen. Everything cuts so beautifully!!!
Above, I am holding up a bench scraper to make sure that the cake is set inside the base foam core board by at least 1/8″ or so. When I go to smooth on my ganache, I use the bottom board as my guide so I can get a nice, straight, smooth ganache coating on it.

On the next board, add a little buttercream and add one cake layer to it. That’s your lid.
Now, wrap your cakes and put a light weight on them and let them rest at room temp overnight to settle as they come to room temp. The next morning, pop them in the fridge (keeping the weight on) and when they are nice and chilled and solid, you can start crumb coating…after you unwrap them of course!

Have fun ganaching those sweet little cakes!! – You CAN achieve those super sharp finishes in no time with the right techniques!!! If you’re wondering how in the world I do this…you really need to check out my Clean & Simple Cake Design Class I did for Craftsy. It’s an online class over 3 hours long where I show how to crumb coat a round and square cake with buttercream and ganache and SOOOO much more!! There is SO much technique to learn in that class I promise it’ll change the way you build your cakes and decorate your cakes or your money back!!
Here’s the link to get it 50% off…Click HERE!

Got to love the play-doh toys in the upper left!! When mama is a bak’n, the kiddos are a play’n!!

Once you’ve got your ganache coat on and it’s set up, brush it with sugar water or a mix of 50/50 corn syrup to water right before you cover it with fondant or modeling chocolate.

Now it’s time to make it pretty!!!
Roll out modeling chocolate to 1/16″ to 1/8″ thick.
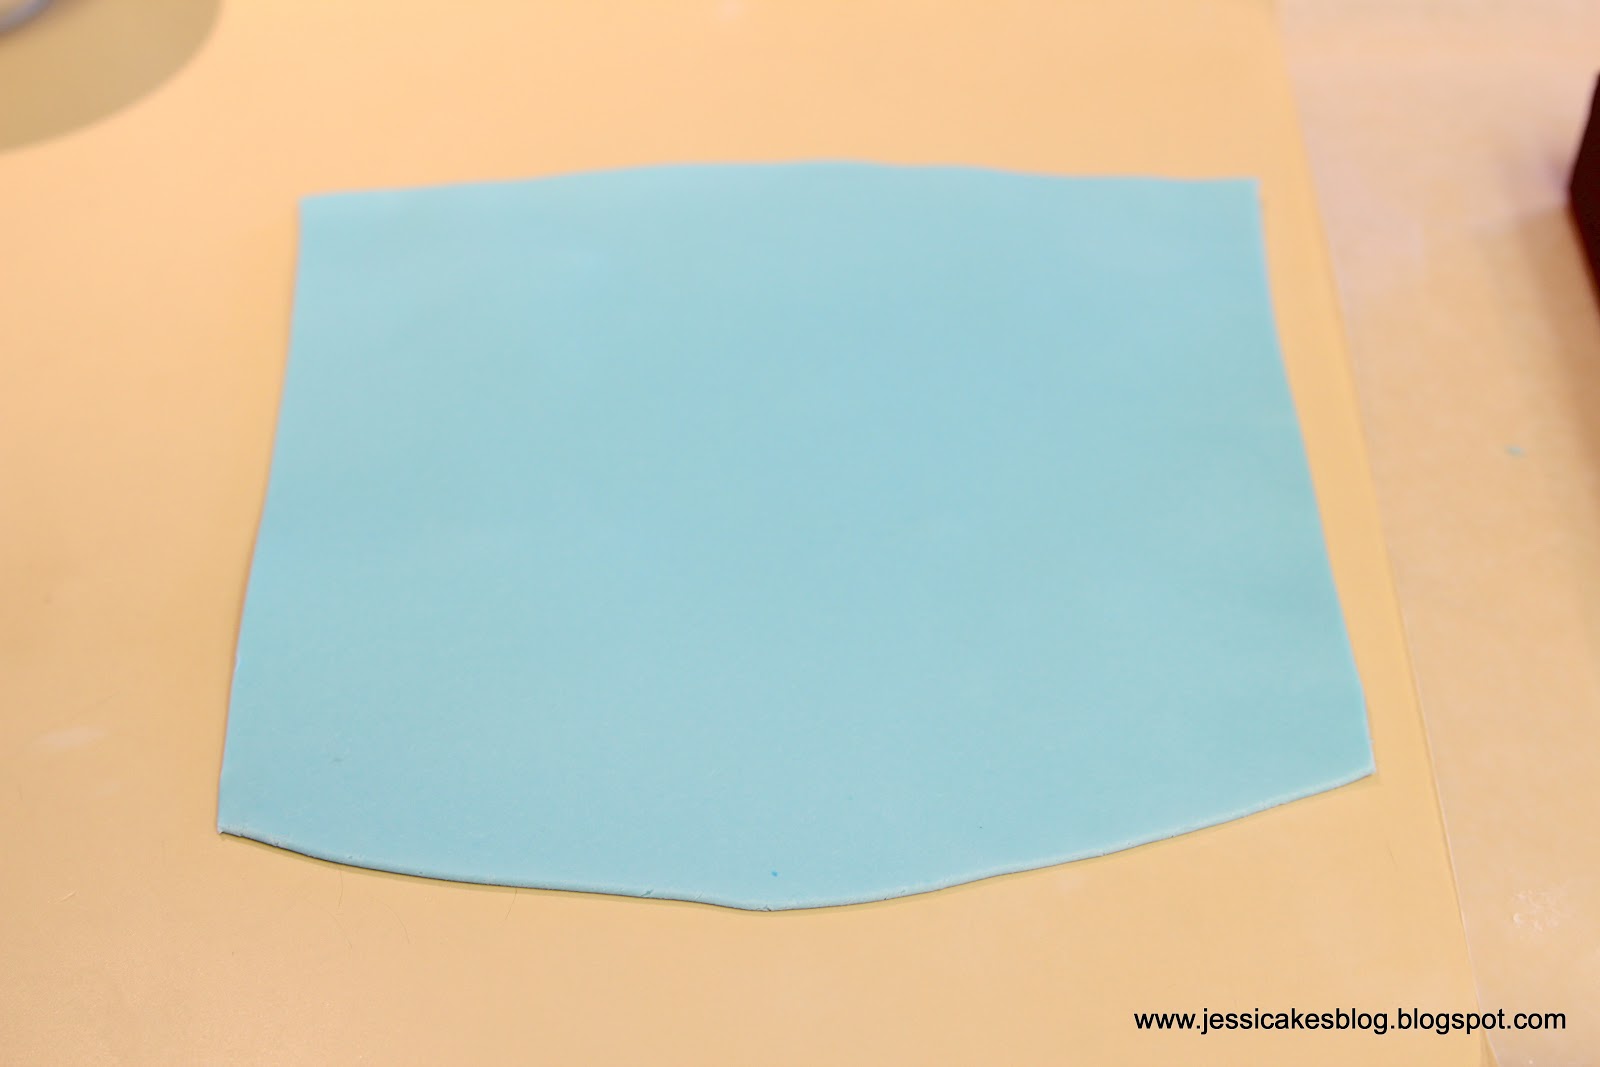
Place the lid upside down on top of the modeling chocolate. NOW…one thing I didn’t do, that you should do is put the modeling chocolate piece on some wax paper first before flipping the cake upside down on it. Once you push the cake down a bit, it can be tricky to get the modeling chocolate and cake flipped back up if it’s slightly sticky and wants to keep kissing that counter!! – but if it’s on wax paper, you can just slide it off your counter onto your hand or a board and flip it back over when you’re done cutting the edges all nice and cleanly then pull off the wax paper!

While it’s still upside down, using a very sharp blade (I prefer a #11 exacto or scalpel) trim the sides (below)

Once you’re done with the sides…flip over. See now I have it on the wax paper!! – because I almost couldn’t move it after I did all the trimming!!

Beautiful clean edges!! :) Now, take more modeling chocolate and roll it 1/16″-1/8″ (just make sure they are all the same) and cut them so they are 1/2″ longer than the sides of your cake x the height of your cake.

Brush the cake with a little sugar water and apply the sides first, then the front and back last. Work the top and one seam at a time by rubbing it with the warmth of your hands so you can barely see the seam anymore.

Voila!!
Now do the same thing again to the main “box” part of the cake.
Now, onto the decorations!! Sorry for my bum template you see in the picture below. I made it a little too short to fit my cake, so I revised one for you all!! Click HERE for a downloadable template of this polka dot design. Sorry, it’s in a pdf format…that’s all I got!! – so please don’t email me asking for another version.

To create this pattern, I used my Wilton #10 icing tip. The tiny circles are the top, and the larger circles are the base of the tip!! – double acting!! You’ll need a good 180+ pink circles and 130+ blue circles…but cut extra!!!!! – and depending upon your cake and it’s size, you might need more or less…so, just count!
Now, let me explain my wax paper transfer method!! You’ll start by taping the template to your counter. Then, tape a piece of wax paper on top of the template making sure to line up the bottom of the wax paper with the bottom of the template. Lightly coat the wax paper with shortening (Crisco or Trexx). Start placing your circles right side down on only side of the pattern (like I do above). Don’t do both sides because it’s harder to get all the tiny pieces on there. Working with the smaller panel is much better!! You’re going to cut half circles at the outside corners then seam the next panel to those tiny guys. The center ribbon gets measured/placed on afterwards when you’re done and see what kind of spacing there is left. My pink ribbon was 3/4″ wide…FYI.
Before you un-tape the wax paper with your design on it, brush the back of all the circles with sugar water (or a mix of 50/50 corn syrup and water). Then, un-tape it, line it up with the bottom of the cake and press onto the cake…like a sticker. I use a fondant smoother to help press it lightly. Once all the pieces are on, peel the wax paper off leaving the design. I ran out of blue dots and cut the last two I had in half to make it work…so, that’s why the right panel below looks short!! :) Whoops! But…thanks to tissue paper you’ll never notice!!


Keep going all the way around making sure to heat those tiny corner circles with your hands to join the seams and make them look like one circle. So beautiful and precise!! Trim the top edges a bit if you need to. The tissue paper will hide it, so don’t worry if it’s not perfect!
Next, cut your pink ribbons!! – I forgot to show that…got moving and forgot I needed to stop and take more pictures!

Now, for the “tissue” paper!!
I used a mix of modeling chocolate and fondant (50/50) because I wanted it elastic and wanted to roll it thin, but wanted it to have some rigidity to stay without sitting out for a while. I made these as I put them on the cake.
Roll the white fondant/MC blend really thin and cut into random squares about 2″x2″…but not exact. You can see the piece I have on the counter down below is a little rounded on the sides…no worries!

You are going to fold it gently in half, then in half again as you pinch the center of the square creating a ruffle effect. Add a little sugar water to the top of the box and place on there careful to hide the ganache top. I left it ganache and didn’t put a top panel of modeling chocolate on it because I knew I’d be covering it with the tissue and lid.

Continue all the way around adding a lot more tissue in the front and only one or two pieces in the back.
Now, add two bubble straws up front sticking up about 1/2″ and two in the back flush with the top of the ganache. I also wrapped the front bubble straws with the fondant/MC blend to hide them since they were yellow and in case you might see them.


Thank you
Thank you so much for a wonderful tutorial
Happy Birthday to your daughter and hope she had a wonderful birthday. Beautiful cake and thanks for sharing the tutorial Jessica
Love it! So glad your back to blogging! I have loved all your crafts classes but I have missed the spiritual encouragement and blessings I have gotten from your blog.
Love it!! So glad your back to blogging, I have loved all your crafts classes but I have missed the spiritual encouragement and blessings I have gotten from your blog
Love it!! So glad your back to blogging, I have loved all your crafts classes but I have missed the spiritual encouragement and blessings I have gotten from your blog
Hi Jessica,
I just wanted to say how sad I was to read you wouldn’t be doing any more Craftsy Classes, but happy for you all the same that you get to spend precious time with your sweetpeas! I have your Clean and Simple Cake Design Class and I learned so much from it! You have an amazing talent for both creating AND teaching. You are so patient and your ability to explain so eloquently while you teach is truly a gift. I will be checking back here for your updates! Thank you for all the tips and tutorials you so generously posts for us followers! You are an inspiration!
So love this cake.. just LOVE the colour combo! Fabulous tutorial.. thank you so much for taking the time putting this together and sharing it with us all.
Hugs..!! Thank you for all your tutorials and your time. I think i feel the same way like you.. I love decorating cakes and same time i don’t want to do it because as a stay home mom i feel i’m not there for my kids all the time.
Thanks so much. You have such loving ways and a beautiful soul.
I hope your baby enjoyed her birthday. You are such a sweetheart! I don’t make cakes but you and a few other cake artists have inspired me to try. Your Craftsy classes have helped me immensely. Thank you so much!!!! Tyress
Fantastic! You are such a blessing! Thank you.
Happy belated birthday to Raquelle! She is so blessed to have a wonderful Mom like you. I am sad you are not going to be doing more Craftsy classes, but excited to check out your third one when it gets released!! At the same time, I like others have said, have missed reading your reflections and spiritual perspective, so I am very thrilled to hear you are back to blogging again! Thank you so much for the tutorial. Beautiful cake, as always, and your instructions are so helpful. Blessings to you and your family!
Hi Jessica
Thanks for sharing the tutorial.
Greetings from Germany
Congrats on making the decision to scale back the “business” and focus for this season on homeschooling! I just recently made the same heart choice. Toward the end of last year, my business began booming more than ever, and I came to a place of “go big or go home”. I decided, for now, for this season, it was time to go home. I’ve spent the last six years trying to juggle being a homeschooling mama and a successful caker… the homeschooling began to take a backseat as my business ramped up and those cakes demanded my time. And I felt, that was backwards. So for at least the rest of this season, it was time to Go Home. Blessings.
That cake is almost too gorgeous to cut and eat.
And your sweetheart is a doll!
It’s beautiful! And you said your were just going to do cupcakes. I guess you couldn’t resist. With sweet Raquelle as a recipient I couldn’t resist either. Awesome job
SHE’S BAAAAAAAAAAAAAAACK!!!! Thanks Jessica and my daughter thanks you as well. Do you think you would ever do a tutorial that sheds some light on using PSE 11? That would really help me to be more creative and to test things out before beginning a project. This is awesome!
hehee!!! There’s going to be a short bonus lesson in my next class!! – for Photoshop Elements!! It’s pretty short…just wetting the whistle…but it’s going to be in there!!
Thanks for the tutorial, can’t wait to try it. Lovely tribute to your beautiful daughter also. I’m sure she’ll treasure it for a lifetime, as you so treasure her.
Jessica, Thank you so much for your post. Putting God first, family second and your own aspirations last, well, it shows you have your heart in the right place! Proud of you, so very proud of you! And thanks for sharing the tutorial. Don’t know if I will ever make use of the knowledge, but am grateful for it. Thank you and God bless you and your loved ones.
I just came across your blog and I am in awe! Thank you for sharing your talents and knowledge with the rest of us. I am fairly new to cake decorating, so I am a little confused about base boards. Do they stay with (on) the cake or you remove them later? I don’t think I’ve seen you mentioned anything like that. I apologize if I missed it. I need to make a cake in two weeks for my granddaughter , and would really appreciate for your answer.
Glad you found me! The base board is really important to always put under your cake layers as you stack/fill them. Then, you can move your cake around or even create multiple tiers because you can support it from below with straws or dowels and the top cake board will be what rests on those supports from below.
If you’re newer to cake decorating and you can swing it, I would highly recommend my online Craftsy class. It’s almost 4 hours of instruction and training on how to get smooth crumb coats on round and square cakes, how to cover them in fondant and get them nice and smooth as well as how to make fondant and apply graphic decorations with precision. I’m not just trying to sell you on it, it will truly save you so much time/head ache and money by learning some of these techniques and will set you up for success. It’s only $20 with my 50% off coupon link: http://www.craftsy.com/cakedesign. Check it out. I know you’ll appreciate it. I wish there was something like that for me when I got started! Hugs!!!
Jessy, you are fabulous! I love every one of your designs. Thank you for this tutorial. Enjoy your kids to the max, they grow so fast! xoxo
Hii, everytime i am amazed to see your talent .
i need your little help.
i have made sour cream chocolate cake and then i coated with ganache and kept it in my freeze for let it set as you said it gives clear and sharp finishing .
i made design and everything came out very preety.
but when my client cut the cake it was very crumbly. where was i wrong pls if u can help me sort it out .
Hi there!
I’m sorry you had trouble with your cake recipe. Perhaps it was over baked? I’m not familiar with the recipe, so I’m not sure what happened. I wish you the best on future cakes!!
Blessings!
This cake is amazing! What a lucky birthday girl! Is the bottom of the box covered in white modeling chocolate or white 50/50 chocolate/fondant? Thank you for posting such an inspirational story as well as an amazing cake design!!!
Thank you!!
The white base you see in the pictures above (that I stack the cake layers on) is a 1/4″ thick piece of white foam core. It acts as the base for the cake so you can pick it up and move the cake around. You can also use cardboard cake circles or rectangles too.
Blessings!
This is so cute! The tissue looks so realistic. Superb, like usual!
How do your cakes remain soft & moist after it’s been defrosted? Mine are always hard.
Are they room temp!? Perhaps it’s your cake recipe…try some of mine at the top tab of the blog called “recipes”. Blessings!
Thank you so much for sharing. Much appreciated. Could you please let me know size of pan you used for your cake and if you had to double or triple your recipe. Both my brother and sister-in-law’s bdays are coming up.
I made my vanilla cake recipe in a half sheet pan as seen in the pics above. Recipes are in the top tab above. Have fun!!
thanks. to confirm. your pan size was 12×18 and you had to double your vanilla cake recipe to fit the pan?
Yes…but just one recipe worth per half sheet pan. Have fun!!!
me again. I’m stressing now. do you not double the recipe because you want your layers to be thin so you don’t have to torte them? love your crafsty class. I’m going to try ganache for the first time.
Yes…one recipe makes 3/4″ tall layers. I am afraid if I double it, it might overflow!
Brilliant! Thanks again.
Forgive my cluelessness – but are the circles made from modeling chocolate and you used the #10 to cut them out? And how do you get them to stick together as a chain on the wax paper before you apply them to the cake?
Thanks!
Yes and yes! They stick to the wax paper not each other. Blessings!
Hi Jessica,
This is a work of art. Thanks for sharing.
Did you remove the foam board from the ‘lid’ before you place it on top of the tissue and Bible straw?
Thank you!
No the foam board has to stay because it sets on the bubble straws. If you don’t have a board under there the cake would sink into the straws.
My baby girl is turning one. My husband and I think of her as a gift from God every day. I want her birthday to be a gift box. what a coincidence finding this blog from you. the cake is so beautiful! thank you for sharing. you use modeling chocolate to cover this cake; I read that you usually prefers fondant to cover cake because modeling chocolate get hard. did you modify this part from your usual practice?
Congrats on your baby girl!!! I do use modeling chocolate when paneling square cakes…but not for draping as it doesn’t have any elasticity to it. Blessings!!
Hi Jessica
I did it!
I made this cake for my baby girl’s first birthday. I did not make the bow because I have the hardest time; too cold, the candy clay melts crack, too warm, it melts.
Thank you for this tutorial. How should I give you credit?
I am not planning to post it on web but m husband and his friends might post it on website.
Yeah! Yes, just have them say inspired by Jessicakes and link people back here to this post. Blessings!!
Hi Jessica
You have inspired me. I am going to make my daughter’s first birthday cake.
I am hoping to finish the cake the night before the party. If I want to break down the steps to do over the next two weeks, what would be the timeline for these steps ie bake the cake two weeks before and freeze…
2) make buttercream
3) cut the cake and stack
4) make chocolate ganache
5) coat the cake with ganache
6) make modeling chocolate
7) roll out chocolate and cover the box
decorate the box
I guess I need a little help thinking this thru since I know I need to wait a few hours before using the modeling chocolate …
I wish you the best in making the cake!! Up top in the tab labeled Q&A, click on the link in there for Most Commonly Asked Questions. I actually go through my cake process and what I do as a mom…scroll down a bit and you’ll see it. Blessings!
I assumed it is safe to leave the cake with buttercream at room temp overnight, right?
Yes, if you haven’t added anything perishable to it. Blessings!
Thank you for the tutorial. It is a big help. Looking forward to more.
Thanks for the awesome tutorial! I am making a Tiffany box for a baby shower, what kind of chocolate did you use for your blue modelling chocolate? The colour you used looks like the right colour for a Tiffany box Thanks!
Hi there!
I used the blue Wilton candy melts to make the blue modeling chocolate. It’s a great color!! You can tint it with a little Americolor Turquoise if you need to. Blessings!
thanks jessica for your wonderful tutorials and craftsy classes, i learnt a lot from both of them
can you please tell me if this lid can be rested besides the box instead of floating above it? i see the ganached cake is nice and firm but still i am assuming there should be some kind of support to put it leaning against it? Thanks
Thank you! Yes, if using a single layer of cake with ganache, it would be safe to have it tilting on your cake. I wouldn’t worry about it at all!! – now, buttercream is another story though!!
Hi Jessica, thank you so much for this tutorial. I have all of your classes from Cratsy and I love, love, love them!!! I’ve also learned so much from them!! — I just have a quick question about this box cake. Can I use swiss meringue buttercream instead of ganache? if so, will the panels still stick to the cake though??
Thank you so much!!! So glad you’ve enjoyed them!!! Yes you can absolutely use Swiss meringue instead of ganache. Just keep the cake chilled when applying the panels so things stay firm. Blessings!!
Thank you so much for your prompt response Jessica, you rock!! ! –love your blog as well
I love your cake Jessica! And you are homeschooling your kids? You really rock.
Thank you!! Yes, I am homeschooling! We pray about it year by year, so as of right now, we have no idea what we’re doing next year!! LOL!! But I love having my kids home. It’s why I’m not online doing many tutorials anymore!!
hanks jessica for your wonderful tutorials and craftsy classes, i learnt a lot from both of them
can you please tell me if this lid can be rested besides the box instead of floating above it? i see the ganached cake is nice and firm but still i am assuming there should be some kind of support to put it leaning against it? Thanks
Thank you! Yes, if using a single layer of cake with ganache, it would be safe to have it tilting on your cake. I wouldn’t worry about it at all!! – now, buttercream is another story though!!
Jessica,
Gosh I just love your blog!!! And I love your heart for Jesus too! I’ve not worked with MC before and have a gift cake I am making for Saturday, and am a don’t really have the time to figure it out by then. Could I do all this with MF instead? Hardened with gumtex if needed? What do you think? I love the “tissue Paper look” So stinkin’ cute!!! I just love your cakes and at some point when I have time (full time Army veterinarian and Mom to 3 boys) I’m going to take your craftsy class.
God Bless!
Jessica (yes, my name is Jessica too).
Hi there!
SO sorry I’m responding only now!! I hope you figured it out…but yes you can use MMF for all the decorations including the paneling of the box. Just let it sit for a bit so it firms up, then use a cardboard/board to transfer the side panels onto the cake so they stay straight (and you don’t get elephant skin) and then just use the wax paper transfer technique for the decorations.
Enjoy the classes! Make sure you snag my 50% off links to save yourself some money. Enjoy those sweet boys of yours!!
Jessica you are truly wonderful. I LOVE ALL YOUR WORK. AWESOME!
God bless you.
great cake and tutorial..thanks for sharing
Hi Jessica thank you so much for the tutorial! Do you cut your own foam core or do you purchase precut already? If precut where do you purchase?
Thanks
Katina
I get it from our Dollar Store then cut it to the size I need. Blessings!!
Thank you very much!
Thank you so so much for this tutorial, God bless you real good!
Thank you Crystads!! He is good!!
You’re such a wonderful momma! God bless you and your babies.
Oh thank you so much Gina!! He is good!! I thank Him for His grace!!!
Thank you Jessica.
Hi what colour is the light.blue fondant and where can . i . get your template my daughter is . turning 14 and i have.no.idea what to do first time makeing a cake any help.will be.great ty
I used Wilton blue candy melts to make modeling chocolate then mixed it with a little fondant and some Turquoise from Americolor to get that color. The template is there on the post. Just “Save As” then print it and enlarge it to the size you need. If you can take my first Craftsy class it will be a huge help!! I go over how to make fondant, make modeling chocolate, how to crumb coat a round and square cake and how to cover them in fondant plus how to use the wax paper transfer method. I’d highly recommend it. Here’s a link for 50% off: http://www.craftsy.com/cakedesign. Blessings!!
I’m a newbie in cake decorating and started making cakes just last year. I would do cakes only when a friend, colleague or somebody would request for it. I learned it all from google and other blogsites of cake artists. I take inspirations from cake artists in different parts of the world. I’m amazed everytime I see a work of art put into a cake. I’ve discovered your work thru Craftsy and I’d like to subsribe to learn more and be a better cake decorator. Thank you for generously sharing some of your tips and techniques.
So glad you found me!! I wish you all the best!
Stupid question, but you said you let the cake cool 10 mins and then wrapped and froze it – did you wrap it in the pan or did you de-pan it first? And does that mean you wrapped and froze it while still warm? Thx!!
PS – I love your stuff and it is so generous of you to share your talents so freely with us all!! Many, many thanks!!
Haha! – It’s not a stupid question. I pop them out of the tin. Otherwise they get gummy and you can’t get them out after they freeze.
So glad you’ve found some helpful info here! Blessings!
Lovely!! And do you wrap them warm? Or let them cool completely first? (Your tutorial was absolutely perfect, by the way. My Gram loved her “present”!)
I wrap the cake layers warm…so it seals in more moisture! Yum! Glad she loved the “present”!
Awesome. Many, many thanks, yet again!!
Hi
As always, your cakes are amazing! I am making a shoe box cake and am using your tutorial as my basis. I have cut, layered and filled with the buttercream now letting it set. Question it is due Saturday morning. Should I let it sit overnight like this then ganache and cover Friday evening? Or would it be ready this evening, maybe I could chill in fridge. Be great to know. It is currently Thursday evening here in UK.
Ali
You want to let your cakes sit a good 5-6 hours to settle before you crumb coat and cover in fondant. So, put a big book on it (after the cover the cake first of course), let it rest for 6 hours, pop it in the fridge (book and all) then once it’s all hard, crumb coat and cover in fondant after the crumb coat firms up. Have fun!!
Hello,
Thank you for such a lovely tutorial.
It is very hot and humid where I live and I used the paneling method on a square cake using fondant and the panels started sliding off the cake and folding at the bottom.
Is there a way to prevent this? Or was it my technique or the weather?
It would be great to know because this method makes covering square cakes much easier than draping those.
Leta
*Ouch* sorry for the typo.
Additional info… It was fondant panels on SBC.
Thanks!
Hi there!
I would mix the fondant with modeling chocolate to give it some stability. Go a good 50/50 on the ratio or even a bit more modeling chocolate. It’ll help. If that’s not an option, can you use ganache for the crumb coat? – it’s much more stable than buttercream. And, I would try try try to roll the medium SUPER thin when panelling. It helps to keep it from getting heavy and sliding down your cake no matter what your crumb coat is. Thinner is better! I hope those tips help!
Hello Jessica! Thank you for your tutorial Where can I get the foam core board that you used for this cake?Thank you!!!
You’re welcome! I actually buy it at the dollar store! But you can get it at any craft store. You probably should consider covering the foam core paper with wax paper so there’s no issues with moisture or wrapping it in tin foil. It was for my daughter and was a quick cake to make/eat, so I didn’t worry about it!
This is the BEST looking gift box cake I’ve seen on the web. Excellent job.
This is such a fantastic tutorial
I’m a pastry chef and always wanting to try new techniques. I love your blog!
By the way – I was homeschooled along with my two brothers. One of the best decisions my parents ever made!
Yay! I’m so looking forward to having my kids around more next year! This year they’ve been at a full time school and it’s been great…but I do miss them and all the things we can tailor fit to their interests. SO, we are back to homeschooling next year!
Thank you so much for this tutorial. I just used it to make a sweet 16 Tiffany inspired box
Yay! So glad you enjoyed it!
Thank u so much for d tutorial, it’s just wow.
thanks
Hi! Thanks for this great tutorial. I’m making a similiar cake. I have 1 question. Is it necessary to have each layer on its own cake board? I don’t believe you did but I’ve seen so many tutorials that they do do that. Thanks you again!
I put a cake board under one tier which includes between 3-5 layers depending on the height. The board at the bottom is so you can move the cake around or stack the cake and therefore allow the board to rest on supports. You would NOT want to put a board between each layer because you couldn’t cut and serve the cake. Only under the entire tier or cake. I hope that makes sense. Blessings!